Brake Disc Thickness Checks
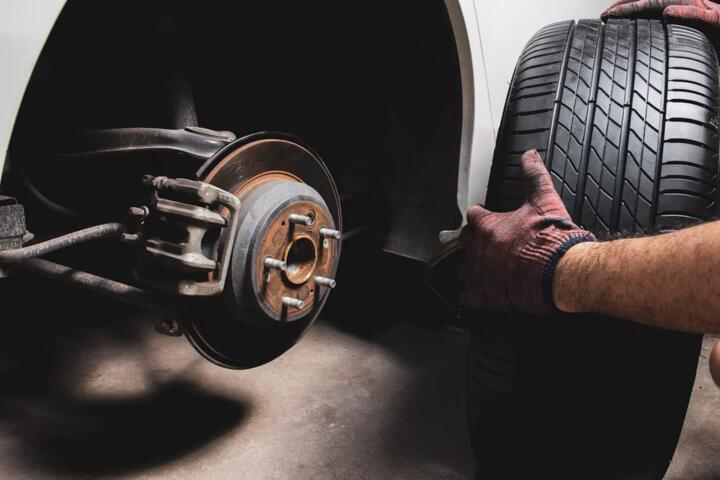
Brake discs (rotors) wear down as pads grind material away, and heat cycles can also change the disc’s shape. Thickness measurement targets the wear part of the problem, while other checks catch warping, cracking, and uneven contact. If you buy a replacement rotor without measuring the current one, you can end up with a part that fits but doesn’t match the vehicle’s wear stage or minimum thickness limits. This article focuses on measuring disc thickness before buying, using practical steps you can repeat at home or at a shop.
Most brake disc listings include a nominal thickness and a minimum thickness. The minimum thickness matters because it’s tied to safe braking performance and structural integrity under heat. For example, a rotor might be 26.0 mm new and have a minimum around 24.0 mm, but the exact numbers vary by model and rotor design. The same vehicle can use different rotor thickness depending on trim, brake package, and axle load.
Thickness alone does not diagnose every issue. A disc can measure above the minimum and still feel rough due to lateral runout, pad deposits, or uneven pad wear. Still, thickness is the fastest measurement that tells you whether the rotor is close to its legal or manufacturer limit, which is why it belongs early in your decision process.
Common Buying Mistakes
People often shop by appearance, then discover the rotor is already near the minimum thickness after the new part arrives. Surface rust, light scoring, and a dark ring near the pad edge can look dramatic while the disc thickness remains within spec. Conversely, a rotor can look “fine” and still be worn thin, especially after long highway driving with consistent pad contact.
Another frequent error involves mixing up disc thickness with pad wear. Brake pads can reach their wear indicator while the rotor still has plenty of thickness, and the reverse also happens. Pads and rotors wear together, but not at the same rate, because pad compound, driving style, and brake cooling conditions change the wear balance. Supporting components matter too: caliper slide pins, piston seals, and brake hose condition affect how evenly the pads contact the disc.
Thickness measurement depends on where you measure. A rotor develops a wear lip where the pad no longer contacts the outer edge, and that lip can trick you into reading the thinnest area or the thickest area depending on your probe position. If you measure only one spot, you miss thickness variation caused by uneven pad contact or disc distortion. If you measure only the “easy” side, you can also miss a side-to-side imbalance that shows up as steering vibration.
Finally, buyers sometimes assume that any rotor with the same diameter and bolt pattern is equivalent. Many rotors share the same external dimensions but differ in hat offset, vented vs. solid design, friction surface profile, and minimum thickness. Those differences show up in fitment and braking behavior, and they can also affect how you interpret thickness readings. The rotor’s part number and the vehicle’s brake package are the starting point, not the seller’s photo.
How To Measure Thickness
Use The Right Tools
A caliper can measure rotor thickness, but a micrometer often gives more repeatable readings for thin metal. For thickness checks, a micrometer with a flat anvil and a consistent measuring force helps you avoid “reading noise” from the tool rocking on the rotor surface. If you use a digital caliper, take multiple readings and average them, because cheap calipers can flex slightly under load. I’ve seen measurements drift by 0.2 mm when the caliper jaws contact a rust ridge instead of the friction surface—small enough to matter near a minimum spec.
Before measuring, clean the friction surface with brake cleaner and a lint-free cloth. Do not sand aggressively unless you know what you’re doing; sanding changes the surface and can alter how the disc looks and how pads seat. If the rotor has heavy corrosion pits, you can measure the “valley” and underestimate thickness. In that case, you still get a useful minimum estimate, but you should treat the reading as a lower bound and plan for inspection.
Measure Multiple Spots
Measure at several locations around the rotor, typically at least 3 points spaced around the circumference. If the rotor has a wear lip, measure on the inner friction band where the pad actually contacts, not on the lip edge. Many technicians also measure at two radii—closer to the center and closer to the outer pad contact—because wear can vary across the swept area. Write down the readings and look for a pattern: a consistent thin spot suggests uneven pad contact, while random variation can reflect measurement error or surface contamination.
When you record values, include the rotor side (left/right) and the date. A simple note like “Front left rotor, 2026-08-26: 24.6/24.5/24.7 mm” helps you compare later if you re-check after pad replacement. If you’re using a micrometer, note the tool model or at least the measurement method, because different tools can read slightly differently. I once compared two tools on the same rotor and got a 0.1 mm difference, which was within the margin but still enough to change the “near minimum” interpretation.
Compare To Minimum Spec
Use the vehicle manufacturer’s minimum thickness for that exact rotor part number. The minimum thickness is usually printed in service documentation, and many rotor boxes include it on the label. If you only have a generic listing, verify the minimum thickness against the vehicle’s brake package. A rotor that measures above minimum still may be replaced for other reasons, but it’s not “automatically unsafe” based on thickness alone.
Also check rotor thickness after any resurfacing decision. Resurfacing removes material and reduces thickness, so you must confirm that the rotor will remain above minimum after machining. If you plan to replace rather than machine, thickness still helps you decide whether you’re replacing rotors only, pads only, or both. A common practical outcome: if the rotor is within about 1 mm of the minimum, many shops recommend replacing rotors with pads to avoid reusing a rotor that may already be heat-cycled and uneven.
Check Shape And Contact
Thickness measurement pairs with checks for lateral runout and surface condition. Lateral runout is the side-to-side wobble of the rotor face relative to the hub. You can measure it with a dial indicator on a stable mount; if runout is high, new pads can still transfer vibration and noise. Surface cracks, especially radial cracks that grow from the friction surface, can also justify replacement even when thickness looks acceptable.
Pad deposits and glazing can mimic wear without changing thickness much. If the rotor has a shiny, hardened surface and pads show uneven transfer, cleaning and proper bedding can help, but a rotor near minimum thickness still needs replacement planning. Caliper slide issues can cause one-sided wear that reduces thickness in one region; in that case, replacing only the rotor can repeat the problem. The supporting system matters because thickness is the result of the whole brake assembly’s behavior.
Educational Case Examples
Scenario A: A 2012 sedan owner buys pads online and plans to reuse rotors. They measure the front rotors at three points on the inner friction band and record 24.1/24.0/24.2 mm. The manufacturer’s minimum thickness for that rotor part number is 23.0 mm, so the rotors are above minimum but close enough that the owner decides to replace rotors during the same job to avoid repeating labor. After installing new pads and rotors, they also clean and inspect caliper slide pins because the old pads showed a mild taper on one side.
Scenario B: A compact SUV owner notices steering vibration during braking and suspects warped rotors. They measure thickness and find 25.8/25.7/25.9 mm on the left rotor and 25.9/25.8/25.9 mm on the right rotor, with minimum spec at 24.0 mm. Thickness looks healthy, so they measure lateral runout and find a higher reading on the left side. The shop replaces the rotor and also checks hub mounting surfaces, since corrosion or debris between hub and rotor can create runout even when thickness is fine.
Thickness Checklist And Table
| Check | What To Measure | What You’re Looking For | Decision Signal |
|---|---|---|---|
| Thickness | 3+ points on swept friction band | Lowest reading vs. manufacturer minimum | Near minimum suggests rotor replacement planning |
| Thickness Variation | Compare inner vs. outer radius readings | Uneven wear pattern | Uneven wear suggests caliper or pad fit issues |
| Runout | Dial indicator on rotor face | Excess wobble relative to hub | High runout points to rotor/hub mounting problems |
| Surface Condition | Cracks, heavy scoring, glazing | Damage that affects friction and noise | Cracks or severe scoring supports replacement |
Step-by-step checklist (quick decision support):
- Confirm the exact rotor part number or brake package for your VIN, then find the manufacturer’s minimum thickness for that rotor.
- Clean the friction surface with brake cleaner and measure thickness at 3+ points on the swept band.
- Record the lowest reading and compare it to the minimum thickness; treat the lowest value as the decision anchor.
- Inspect for cracks and heavy scoring; check pad wear pattern for taper that suggests caliper issues.
- If you feel vibration, measure lateral runout or have a shop measure it; thickness can look fine while runout is the cause.
Common Mistakes To Avoid
Measuring on the rust ridge or the wear lip produces misleading thickness readings because those features sit outside the pad’s swept area. A rotor can have a visible lip while the friction band remains within spec, so the reading depends on where the tool contacts. Another mistake involves using a single measurement point and assuming the rotor is uniform. Uneven pad contact can create a localized thin area that you only find by measuring multiple spots.
Buyers also confuse rotor thickness with rotor “diameter” and assume that matching diameter guarantees compatibility. Rotor thickness affects heat capacity and structural margin, so minimum thickness matters even when the rotor bolts on. If you replace rotors without addressing caliper slide stiffness or piston seal drag, the new rotor can wear unevenly and reach minimum thickness sooner than expected.
Finally, some people rely on seller claims without verifying minimum thickness. Rotor listings can show nominal thickness but omit the minimum, and some listings mix data from different rotor variants. If the listing lacks the minimum thickness, you can still measure your current rotor, but you’ll need a reliable source for the minimum spec before making a safety decision.
FAQ
What thickness reading triggers replacement?
Replacement planning starts when the rotor’s measured thickness reaches or drops below the manufacturer’s minimum thickness for that exact rotor part number. If you’re within a small margin above minimum, many owners choose replacement to avoid repeating labor and to reduce the chance of uneven heat cycling.
Where should I measure brake disc thickness?
Measure on the friction surface band that the pads actually contact, not on the outer wear lip or rust ridge. Take readings at multiple circumferential points and, if possible, compare inner and outer swept radii.
Can a rotor be above minimum thickness and still be bad?
Yes. Lateral runout, pad deposits, glazing, or cracks can cause vibration, noise, or poor braking even when thickness remains above minimum. A thickness check pairs with surface inspection and, when symptoms exist, runout measurement.
Do I need to replace rotors when I replace pads?
Not automatically. If rotors measure comfortably above minimum and show no cracks or severe scoring, pad replacement alone can be reasonable. If rotors are near minimum or show uneven wear from caliper issues, replacing rotors with pads often prevents repeating the same failure mode.
How do I confirm the correct minimum thickness spec?
Use the vehicle’s brake package and rotor part number, then consult the manufacturer’s service information or the rotor manufacturer’s published minimum thickness for that exact variant. Generic listings can omit the minimum or mix variants, so verification matters.
Author's Insight
Thickness measurement is a practical gatekeeper because it ties directly to the rotor’s structural margin under heat. A careful reading depends on measuring the swept friction band at multiple points and comparing the lowest value to the manufacturer’s minimum thickness for that rotor variant. Symptoms like vibration often trace to runout or hub mounting issues, so thickness checks should not replace those checks when symptoms exist. If you’re shopping online, matching the rotor part number to your VIN reduces the risk of buying a rotor with a different minimum thickness or friction profile.
Key Takeaways
- Measure rotor thickness on the swept friction band at multiple points, then use the lowest reading for your decision.
- Compare against the manufacturer’s minimum thickness for your exact rotor variant, not a generic listing.
- Thickness does not diagnose runout, cracks, or caliper-related uneven wear, so pair measurement with surface and symptom checks.
- Address supporting brake issues like caliper slide stiffness or hub mounting corrosion to prevent repeat uneven wear.