Cold Vs Hot Coolant
Coolant level readings depend on engine temperature because coolant expands as it heats and contracts as it cools. That expansion changes the height you see in the reservoir, and it can also affect how much coolant sits in the radiator neck. If you check at the wrong temperature, you may misread a normal level as low or overfilled.
Most vehicles use a translucent overflow reservoir with “MIN” and “MAX” marks. The reservoir is designed for topping up without opening the pressurized radiator cap. Many cars also have a radiator filled through a neck that is sealed by a pressure cap, which should not be opened when hot. On a long drive, the coolant system runs hotter than you expect, so the level can rise noticeably before you park and cool down.
As a practical example, a reservoir that sits near the MIN line after an overnight cool-down may rise toward the MAX line after highway driving. That movement can be normal. The same car might show a different pattern if the thermostat is stuck open, if there’s a slow leak, or if air remains trapped after a prior service—conditions that change how the system fills and purges air.
Common Reading Mistakes
People often check coolant at the wrong time, then treat the reading as a defect. A hot engine can show a higher level due to thermal expansion, and a cold engine can show a lower level because coolant has moved into the radiator or overflow system. Reading the reservoir without waiting for the correct temperature window can lead to unnecessary topping up.
Another frequent error is opening the radiator cap on a hot engine. The cooling system is pressurized, and hot coolant can spray if the cap is removed. Even if you “only want to check,” the risk is real. Many owners learn this the hard way—usually with a face full of steam and a mess on the engine bay.
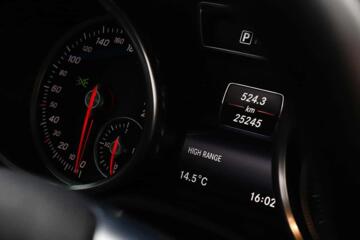
Coolant level also depends on system design. Some reservoirs have a baffle that makes the level look stable even when the system is not fully purged. Other designs use a sensor that triggers a warning based on coolant level or temperature, not on a simple visual line. If your dashboard warning appears, the correct response is to follow the vehicle’s manual, not to guess based on a quick glance.
Supporting technologies matter too. A thermostat controls coolant flow to the radiator, an electric fan changes heat rejection, and an overflow valve manages expansion. If the thermostat sticks, the engine may run cooler or hotter than expected, and the coolant level behavior can deviate from what you’d see on a healthy system.
How To Check Safely
Use The Reservoir Marks
For most cars, the safest method is to check the overflow reservoir when the engine is cold. Wait until the temperature gauge is at or near normal and the engine has cooled enough that you can touch nearby components without discomfort. Then look at the reservoir level relative to MIN and MAX marks. If the level is below MIN, add coolant to the correct line using the type specified in the owner’s manual.
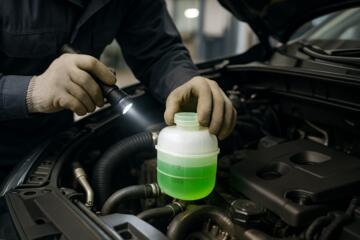
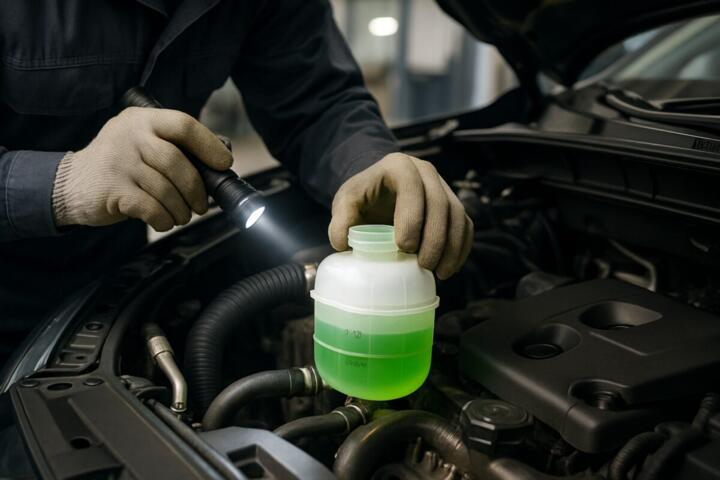
Many manuals describe a specific wait time, often around 30 minutes after shutdown, but the real cue is “cold enough to avoid steam risk.” If your reservoir is hard to see, use a flashlight rather than removing parts. A small aside: on one vehicle I serviced for a friend in 2023, the reservoir level was easiest to read from the passenger side because the engine cover blocked the front view.
Don’t Open Hot Radiators
Do not open a pressurized radiator cap when the engine is hot. If your vehicle uses a radiator cap rather than a reservoir-only system, the manual will specify a cold-check procedure. In many cases, the radiator should be checked only after the engine cools fully, and the cap should be opened slowly to release any residual pressure.
If you need to confirm coolant in the radiator neck, follow the manual’s sequence exactly. Some cars require a specific procedure to avoid trapping air. Skipping steps can cause air pockets, which can lead to overheating even when the coolant level “looks fine.”
Interpret Cold Vs Hot
Cold readings are the reference point for “low vs normal” because the system has contracted to its baseline volume. Hot readings are useful only for understanding whether the system is behaving normally during operation, not for deciding whether to top up. A reservoir that rises from near MIN to near MAX after driving can be normal thermal expansion, especially if the engine reaches operating temperature and the fan cycles.
When hot, the coolant level can also rise due to a problem such as combustion gas intrusion, a failed cap, or a blocked radiator. Those issues usually come with other signs—smell, color change, repeated warnings, or temperature spikes—so a single hot reading is not a diagnosis.
Know When To Stop Driving
If the coolant level is below MIN on a cold check, treat it as a leak or consumption issue until proven otherwise. If you also see puddles under the car, notice sweet-smelling vapor, or get repeated overheating warnings, stop driving and arrange service. For travel planning, keep a small plan: if you’re more than a short distance from help, you may need to call roadside assistance rather than continuing.
Realistic outcomes depend on the cause. Topping up a small amount after a minor overflow loss can stabilize the system temporarily, but a persistent drop usually means a leak, a failing cap, or a cooling system that needs inspection. If you add coolant and the level drops again within days, the next step is a pressure test and inspection, not repeated topping.
Educational Case Examples
Scenario A (reservoir check after a trip): A driver checks the overflow reservoir the same day after highway driving. The level sits near the top of the visible range. The next morning, after the engine cools overnight, the level is near MIN but still above it. The vehicle shows no overheating warnings and the temperature gauge behaves normally. The driver waits for the cold check before deciding, and the reading stays within the expected band.
Scenario B (low cold level with repeated warnings): Another driver notices the coolant warning light during a commute. They park and wait for cooling, then check the reservoir. The level is below MIN on a cold engine. They add coolant to the correct mark, drive a short distance, and the level drops again. The car also shows intermittent temperature spikes. The driver stops topping up and schedules a cooling system inspection because repeated loss points to a leak or air problem.
Cold Vs Hot Checklist
| Check Type | When To Look | What You Compare | Typical Meaning |
|---|---|---|---|
| Reservoir (Cold) | After engine cool-down per manual | MIN vs MAX marks | Below MIN suggests low coolant or a leak |
| Reservoir (Hot) | Only for observation, not topping | Level rise vs prior cold baseline | Higher level can be normal expansion |
| Radiator Neck | Only when fully cold and per manual | Fill level in neck | Low neck level suggests air or loss |
| After Topping | Recheck on next cold cycle | Return to MIN–MAX band | If it drops again, schedule inspection |
Step-by-step cold-check routine:
- Park on level ground and turn off the engine.
- Wait until the engine is cold enough to avoid steam risk.
- Check the overflow reservoir level against MIN and MAX.
- If below MIN, add coolant matching the vehicle specification.
- Recheck after the next cold cycle; repeated drops point to a leak or air issue.
Practical Common Mistakes
Adding the wrong coolant type is a common problem. Many vehicles specify a particular coolant chemistry (for example, OAT vs HOAT) and mixing can reduce corrosion protection. The owner’s manual usually lists the correct specification, and a quick check of the coolant label on the bottle can prevent a mismatch.
Another mistake is topping up without checking for the reason the level dropped. A slow leak can be hard to see, especially if it evaporates near hot components. If the level falls again, a pressure test and inspection of hoses, clamps, radiator seams, and the water pump area are more reliable than repeated small top-ups.
People also misread “air pockets.” After coolant service, trapped air can cause erratic temperature readings and a reservoir level that doesn’t behave normally. Bleeding procedures vary by model, and a generic “fill and go” approach can leave air in the system.
A mild frustration point: some cars hide the reservoir behind covers, and the marks are hard to see. If you can’t read the level clearly, use a flashlight and take a moment to confirm the MIN and MAX positions rather than guessing.
FAQ
Should I Check Coolant When Hot?
Check the reservoir when cold for a reliable MIN vs MAX comparison. Hot readings can reflect thermal expansion and are not a dependable trigger for topping up.
What If The Reservoir Is Above Max?
If it’s above MAX on a cold engine, stop topping and recheck after the next cold cycle. Persistent overfill can indicate a cap or system issue and may require inspection.
Can I Add Water Instead Of Coolant?
Use the coolant type specified by the manufacturer when possible. In an emergency, some manuals allow water temporarily, but the system should be corrected with the proper coolant mixture as soon as practical.
Why Does The Level Drop After Topping?
A recurring drop after topping usually indicates a leak, a cap problem, or trapped air. Recheck on the next cold cycle and schedule a cooling system inspection if it falls again.
Is A Coolant Warning Always A Level Problem?
Not always. Some warnings relate to temperature, fan operation, or sensor readings rather than a simple low-level condition, so pair the warning with a cold reservoir check.
Author's Insight
Coolant level checks work best when you treat temperature as part of the measurement. Cold readings align with the system’s contracted volume, so MIN and MAX marks become meaningful. Hot readings mainly show expansion behavior and can mislead decisions about topping up.
Vehicle cooling systems also depend on components like thermostats, radiator fans, and pressure caps, which can change how coolant moves between radiator and reservoir. That’s why a single reading rarely explains the cause of overheating or coolant loss.
For a practical reference point, many manuals specify a cold-check procedure and a coolant specification; following those instructions reduces risk. If you want a tool, a basic flashlight and a phone photo of the reservoir against the marks can help you compare changes over time—version 1.0 of your “before/after” record, basically.
Key Takeaways
- Use cold-engine reservoir readings to judge MIN vs MAX; hot levels often rise from normal expansion.
- Do not open a pressurized radiator cap when hot; follow the manual’s cold-check procedure.
- If the level is below MIN on a cold check, treat it as a leak or air problem until inspected.
- After topping up, recheck on the next cold cycle; repeated drops justify a pressure test and cooling system inspection.