Desk Setup Basics
A first desk setup is a bundle of small decisions that affect posture, eye comfort, and daily friction. Start with the work surface and seating, then match the monitor height, keyboard position, and lighting to your body. If you work on a laptop, you still need a plan for screen height and input devices, because laptop stands alone rarely fix keyboard and mouse alignment.
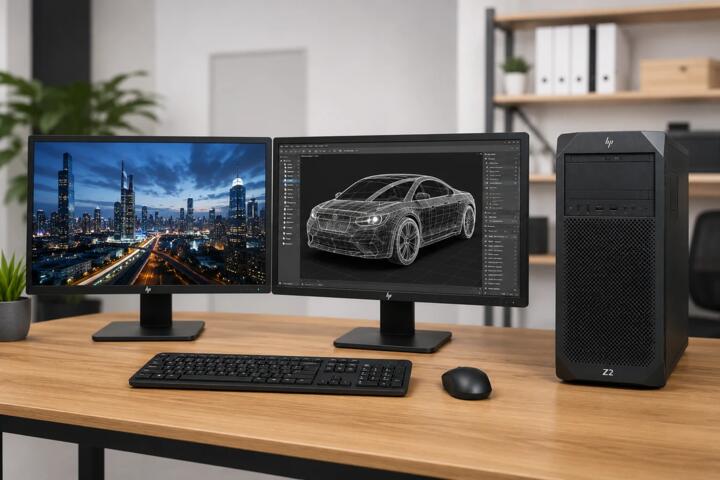
For a concrete example, a typical home office workflow uses a laptop or desktop, a keyboard, a mouse, and a single monitor. If the monitor sits too low, you end up rounding your shoulders; if it sits too high, you strain your neck. If the desk is too deep, your keyboard can drift forward and your elbows stop resting near your sides.
On the shopping list, you’ll see categories like desk, chair, monitor stand, keyboard, mouse, lighting, cable management, and storage. Each category has a few measurable specs you can check before buying, which reduces the chance of ending up with a “pretty but unusable” setup.
Main Problems And Pain Points
People often buy items in the wrong order. They start with a monitor or a desk lamp, then discover the chair height range does not match their body, or the desk surface forces their forearms to float. That mismatch shows up as shoulder tension after 30–60 minutes, not after a week.
Another common issue is treating “ergonomic” as a label instead of a fit. A chair with a wide seat pan can feel fine at first, then press into the backs of your thighs. A keyboard that feels good for typing can still cause wrist extension if the desk is too high or the keyboard tray is missing.
Lighting causes a surprising share of discomfort. Glare from a window or overhead fixtures can make you squint, and squinting changes how you blink and focus. Many people solve this with a lamp angle, then forget to check the monitor’s brightness and contrast settings, which can worsen eye fatigue.
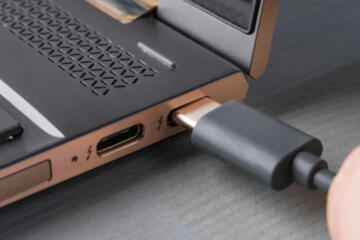
Supporting technologies also matter. If you use a laptop, the docking method affects cable clutter and screen stability. USB-C docks vary in video output support, and some require specific drivers or firmware versions; a dock that works on one laptop model may not work on another without updates.
Solutions And Advice
Choose Chair And Desk First
Pick a chair that supports your body with adjustments you can actually reach. Look for seat height adjustment, backrest tilt, and armrests that can move enough to keep elbows near a relaxed angle. If your chair does not adjust, you will compensate with desk height or keyboard height, which usually fails over time.
For desk height, measure your current seated posture. A practical target is keeping forearms roughly parallel to the floor when your hands rest on the keyboard. If you cannot reach that, a keyboard tray or an adjustable desk can help, but the tray must not force your wrists into a bent position.
When I help friends plan setups, I often see them buy a chair first and then realize the desk is too tall for the chair’s lowest setting. That mismatch is fixable with a footrest, but a footrest is not a substitute for correct desk height. A basic footrest with a slight incline can reduce leg fatigue, especially on shorter desks.
Set Monitor And Input Height
Use a monitor stand or riser to align the screen so you can read without leaning forward. A common starting point is placing the top of the screen around eye level, then adjusting based on your glasses and your typical posture. If you use a laptop, a stand plus an external keyboard and mouse usually beats a laptop-only setup.
Keyboard and mouse placement should keep elbows close to your sides. If your keyboard is too far forward, your shoulders creep up; if it is too far back, you reach and strain your wrists. A simple test is to sit back, rest your forearms on the desk, and check whether your wrists stay neutral while typing.
For a small but real-world detail: many people buy a monitor arm, then forget to check the monitor’s VESA mount pattern and weight rating. A monitor arm that cannot safely hold the display can sag, which changes your viewing angle and makes you tilt your head. I once saw a setup where the arm’s tension knob was set too low, and the screen slowly drifted downward over a week.
Case Examples
Apartment Desk With Laptop
Scenario: A person works from a laptop on a small desk. They buy a laptop stand but keep using the laptop keyboard and trackpad. After a few weeks, they report wrist discomfort and neck tension because the screen height improves while the input height stays wrong.
Fix: They add an external keyboard and mouse, then raise the stand so the screen sits near eye level. They also reposition the lamp to avoid window glare and use a short cable sleeve to keep the dock and charger from tangling. The desk feels less “busy,” and the discomfort drops because the input and viewing heights match their seated posture.
Shared Office With Monitor Arm
Scenario: Two coworkers share an office and each uses a different laptop. One installs a monitor arm and leaves the monitor at a fixed height. The other laptop user complains of headaches after long sessions because the monitor height and laptop keyboard alignment do not match their body.
Fix: They agree on a baseline monitor height and use a consistent external keyboard and mouse for both laptops. They also check the dock’s video output settings and confirm the monitor arm’s weight rating for the display model. The setup becomes repeatable, which reduces the “adjust every day” problem that causes most of the strain.
Comparison Table And Checklist
| Category | What To Look For | Common Failure Mode | Quick Check |
|---|---|---|---|
| Chair | Seat height range, back tilt, armrest adjustability | Armrests too high or too low for desk height | Sit and rest forearms; shoulders should stay relaxed |
| Monitor | Readable text, adjustable brightness, correct height | Glare causes squinting | Check reflections at your usual time of day |
| Keyboard/Mouse | Neutral wrist position, comfortable reach | Keyboard too far forward | Elbows near sides while typing |
| Lighting | Directional light, glare control | Lamp aimed at the screen | Move lamp; look for screen glare changes |
| Cables | Under-desk routing, strain relief | Loose cables tug on ports | Check that cables do not pull when you move |
Step-by-step checklist for your first week:
- Set chair height so feet rest flat or on a footrest, and thighs feel supported.
- Place keyboard so elbows stay near your sides and wrists stay neutral.
- Raise monitor so the top third sits near eye level for your normal posture.
- Adjust lamp position to remove reflections; then set monitor brightness to match the room.
- Route cables behind the desk edge and confirm the dock or power brick does not block leg movement.
- Do one 45-minute work block and note where discomfort starts; change one variable at a time.
Common Mistakes
Buying a high-end chair without checking desk height is the most frequent mismatch. If your desk is too high, you will raise your shoulders even with a good chair, and the problem returns as soon as you settle into longer sessions.
Another mistake is relying on a monitor stand while keeping the laptop keyboard. Screen height improves, but wrist and elbow angles remain wrong, which shifts strain to the hands and forearms. External input devices fix that because they decouple screen and keyboard positioning.
People also overcorrect lighting. A lamp placed “brighter” can increase glare, and a dim room can make you increase monitor brightness. Adjusting both at once makes it hard to tell which change helped, so discomfort persists longer than it needs to.
Some setups ignore cable strain relief. When a dock cable hangs from the laptop, repeated motion can loosen the connector and cause intermittent disconnects. Those disconnects lead to troubleshooting stress, which often shows up as posture changes and fatigue.
Finally, privacy gets skipped. A webcam mounted on top of a monitor can capture your screen and desk items during calls. If you use video meetings, check camera framing and consider a physical privacy cover when you are not in use.
FAQ
What Desk Size Works First?
A practical starting point is enough depth for keyboard and mouse without reaching, plus room for a monitor stand. If you use a laptop and external keyboard, measure your current reach and leave space for a lamp and cable routing.
Do I Need A Monitor Or Can I Start With A Laptop?
A laptop-only setup can work for short sessions, but screen height and input alignment usually become the limiting factors. Adding an external keyboard and mouse often reduces strain even before you add a monitor.
How Do I Choose A Keyboard And Mouse?
Choose based on neutral wrist position and comfortable reach to the mouse. If you type for long periods, test key feel and spacing, then check whether your forearms rest on the desk without shoulder lift.
What Lighting Specs Matter Most?
Focus on glare control and consistent brightness rather than color marketing. Aim light at the work surface, then check reflections on the monitor at your usual time of day.
How Can I Reduce Privacy Risks?
Reposition the webcam so it does not capture your screen, review microphone and camera permissions in your operating system, and use a physical camera cover when you are not in calls.
Author's Insight
A first desk setup succeeds when posture variables match each other: chair height, keyboard height, and monitor height. Most discomfort comes from one misalignment that shifts load to shoulders, wrists, or eyes, then compounds over longer sessions.
Evidence-based ergonomics focuses on fit and adjustability rather than brand names. If you can measure your current posture and then change one variable at a time, you can usually identify the source of strain faster.
For technology choices, the safest approach is to verify compatibility: monitor mounting patterns, dock video support, and cable types. A small detail like a dock firmware update on a specific date (for example, a vendor release in 2024) can change behavior, so checking documentation reduces surprises.
For privacy, device placement and permission settings often matter more than software promises. A webcam cover and careful framing reduce exposure without relying on complex settings.
Key Takeaways
Start with chair and desk height, then align keyboard and monitor to your body. Choose lighting that removes glare and keep brightness consistent with the room. Manage cables to prevent port strain and daily clutter, and check webcam framing if you use video calls.
Use the first week to test one change at a time, because discomfort usually points to a specific mismatch rather than a single “bad product.” If something feels off after a short work block, adjust the setup before adding more gear.